When discussing the concept of my project at the start of the semester, I wanted to contextualise my product with a custom Adobe Muse website to act as a platform to sell it – this seemed like a very logical reason as I have good eye for design and no prior knowledge of HTML, which would make creating a website fairly difficult. However, fast forward to today, a new announcement has just been released by Adobe stating that Muse will no longer be supported and within 2 years the program will be terminated, all discussed in this webpage: https://helpx.adobe.com/muse/kb/adobe-muse-end-of-service.html
Unfortunately, this has created new problems for me which I didn’t expect to encounter – now that Muse will be unsupported in 2 years, how will I get around hosting my work via Business Catalyst and what are the alternatives?
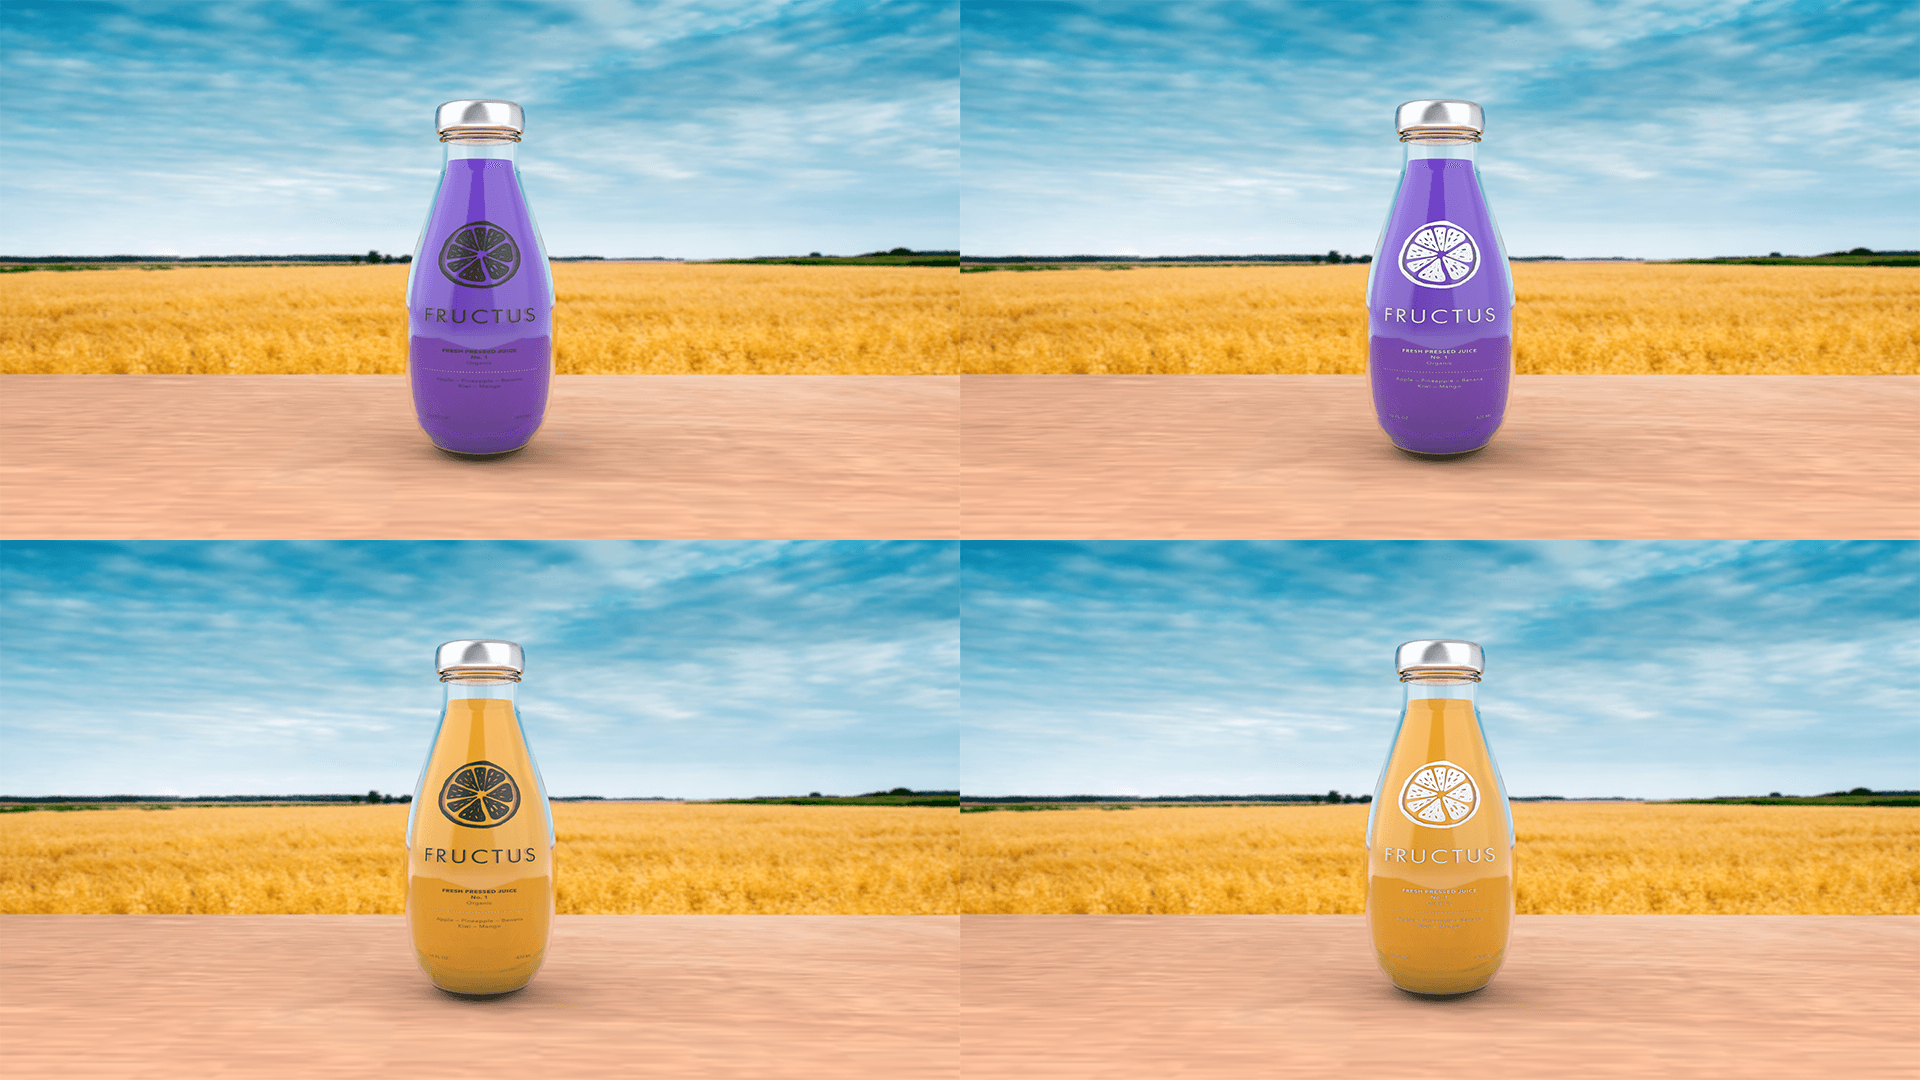
After creating the liquid objects for all of the models, I wanted to create the scene in which the models were going to be placed in when rendered. Using my knowledge from previous projects, I started to create the scene with textures in order to stage the models, documented in the video below I discussed these developments and also further talking about problems I encountered.
The creation of the scene was a very easy process to complete initially as I understood the basics of setting it up, however, when it came to making the fine adjustments that was when I found it consumed a lot of time. One specific example of this was adding depth of field, I experimented with this in two ways: by actually adding it to the camera under the render settings and also by adding blur to the background image in the material editor. I found that adding depth of field to the camera under the render settings worked the best as it allowed for a smoother transition from focus point to the unfocused (blurry) point in the image – by using the other method, all of objects in the foreground were clear and didn’t look aesthetically pleasing when next to the blurry background image.
Renders:
These are the renders of the scene – specifically the images & textures that were used. I used one model to act as a placeholder so I could get a better feel for the set up of all of the scene objects and camera positions to best show off the product.
Overall, I think the lighting of it was really good and helps to bring the product to life as it looks real, however, after a lot of thought and reflection I’m not sure that the background suits the style of the product – because the product is supposed to be minimalist, I feel there is too much going on in the background which will distract the audiences eye. In addition, trying to think ahead to the creation of my website, will these images conflict with the minimalist theme that I intend to use throughout the website or will it prove more difficult for me to integrate them.
Whats Next?
Next, I will make some adjustments to the label, fixing points which I highlighted in the video – I will then follow up on this with a render to show its changes. As well, I will also start to work on the liquid materials, focusing on trying to create something that looks realistic. Finally, I will also aim to produce an alternative scene, one that better suits the minimalist design utilised throughout my product.
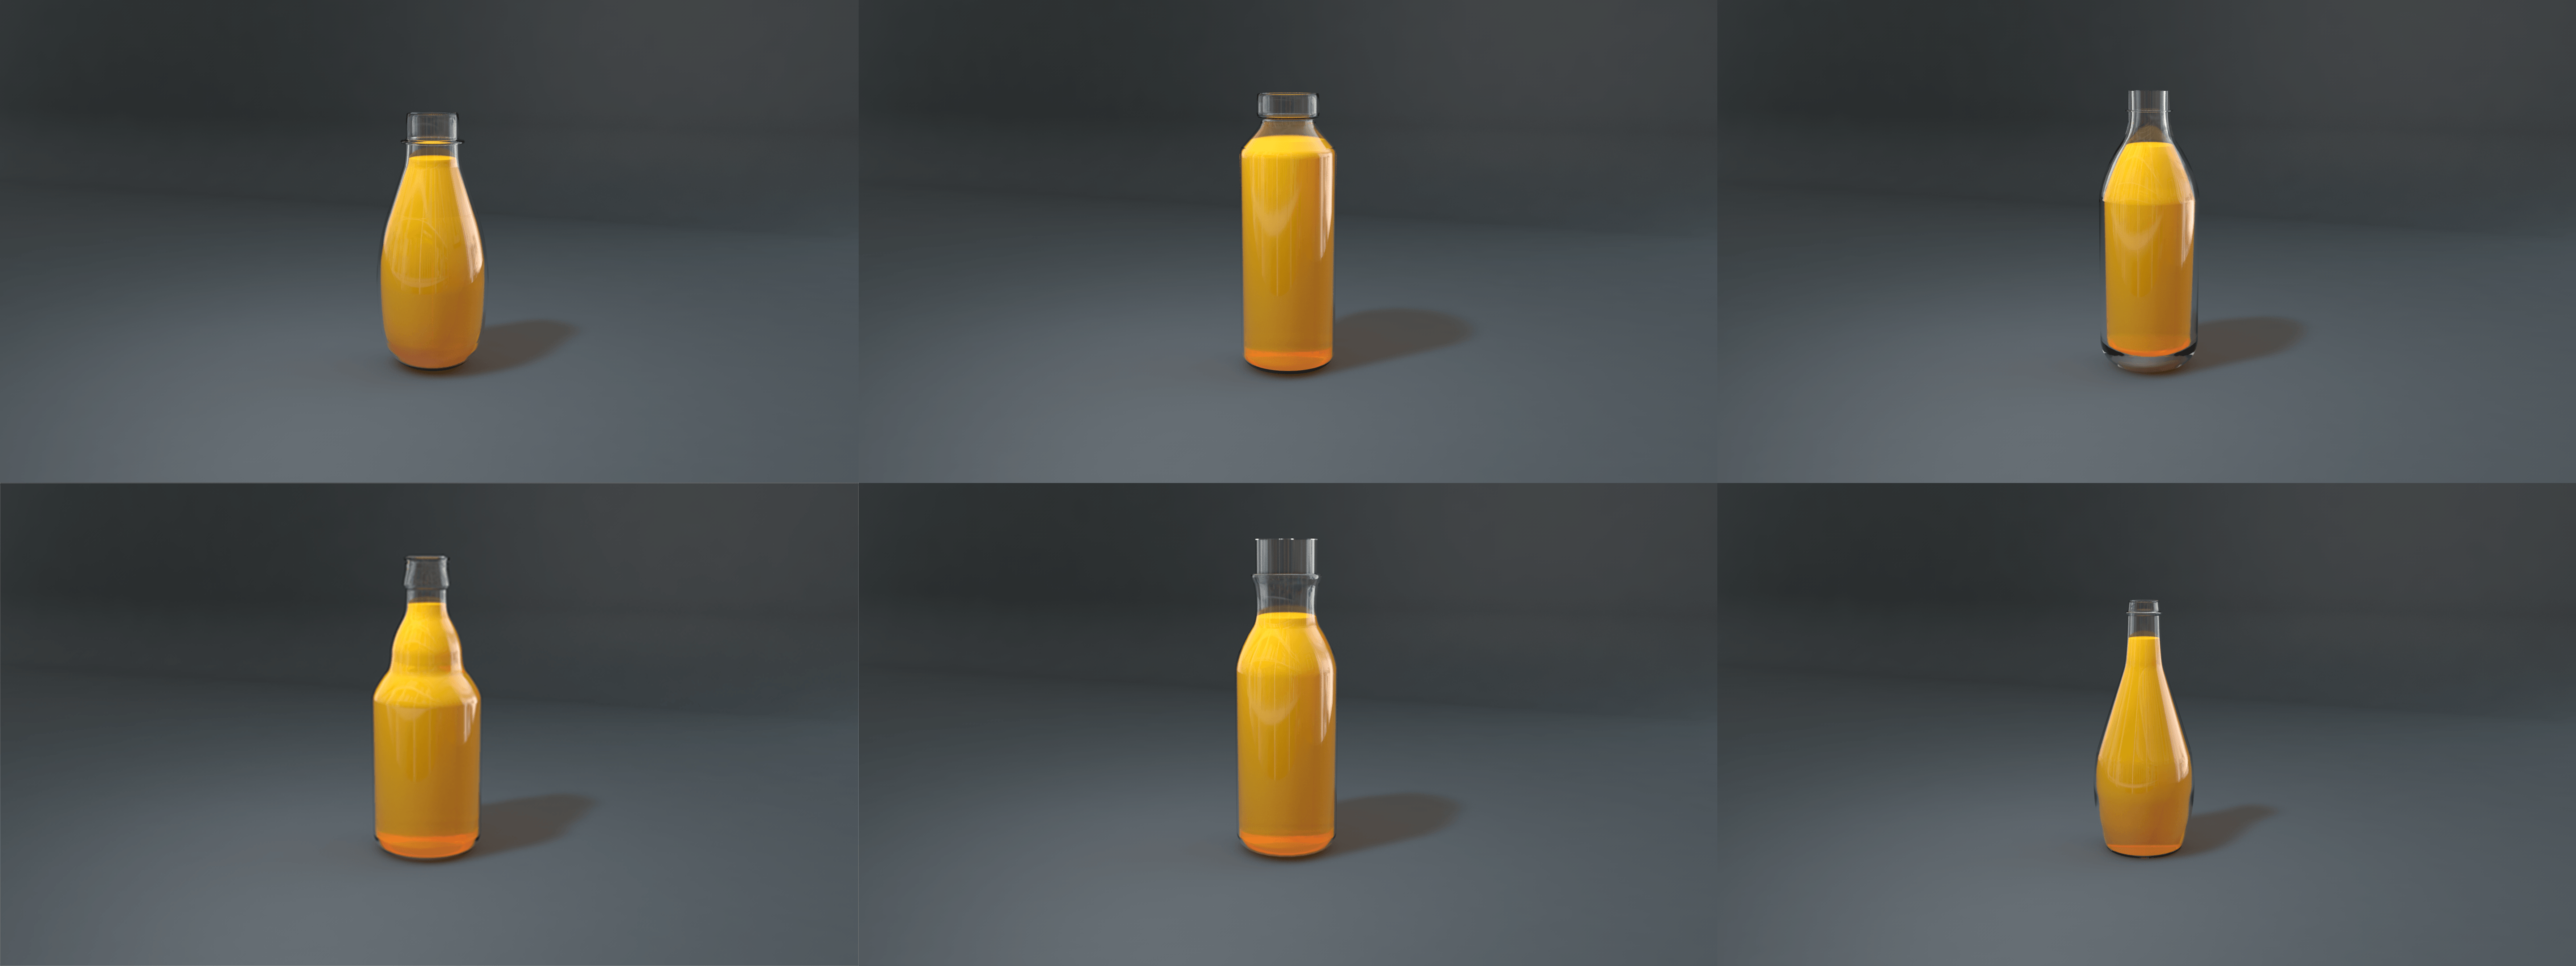
After my last modelling post where I showed all of the different bottle designs, I wanted to take these further by creating the liquid that goes inside of them. Using my research from the prior posts, I started to create the liquid and also documented my process in the video below.
The overall the results turned out really well, the bottle with the liquid looks really good especially when the liquid inside has some transparency (not shown in the video) as it looks even more realistic. Prior to this video, I had completed a test to make sure my processes worked, enabling me to successfully create it on the screen recording – I had found out that it was best to make the liquid object inside of the bottle slightly smaller so that the inside spline of the bottle and the outer spline of the liquid didn’t intersect – not completing this produced some visual defects on the render where the liquid visible popped through the glass. However, from the video above, you can see that I included this step within my process and didn’t encounter this problem.
Final Renders:
These are all of the renders of all of the bottles, I wanted to see what they all looked like with liquid inside of them before choosing the final bottle, I feel that showing them with something inside will drastically change the way they appear and also the way in which light interacts with the liquid.
These turned out really well and further support my statement of making some of the bottles look more aesthetically pleasing – especially bottles 1, 3, 5 and 6. I feel that these will be the ones which I continue forward with my testing with the labels and caps (and then from this, I will choose one of four for the final bottle for my product).
Whats Next:
Next, I will start to create caps for all of the models, in addition to adding the labels to them.
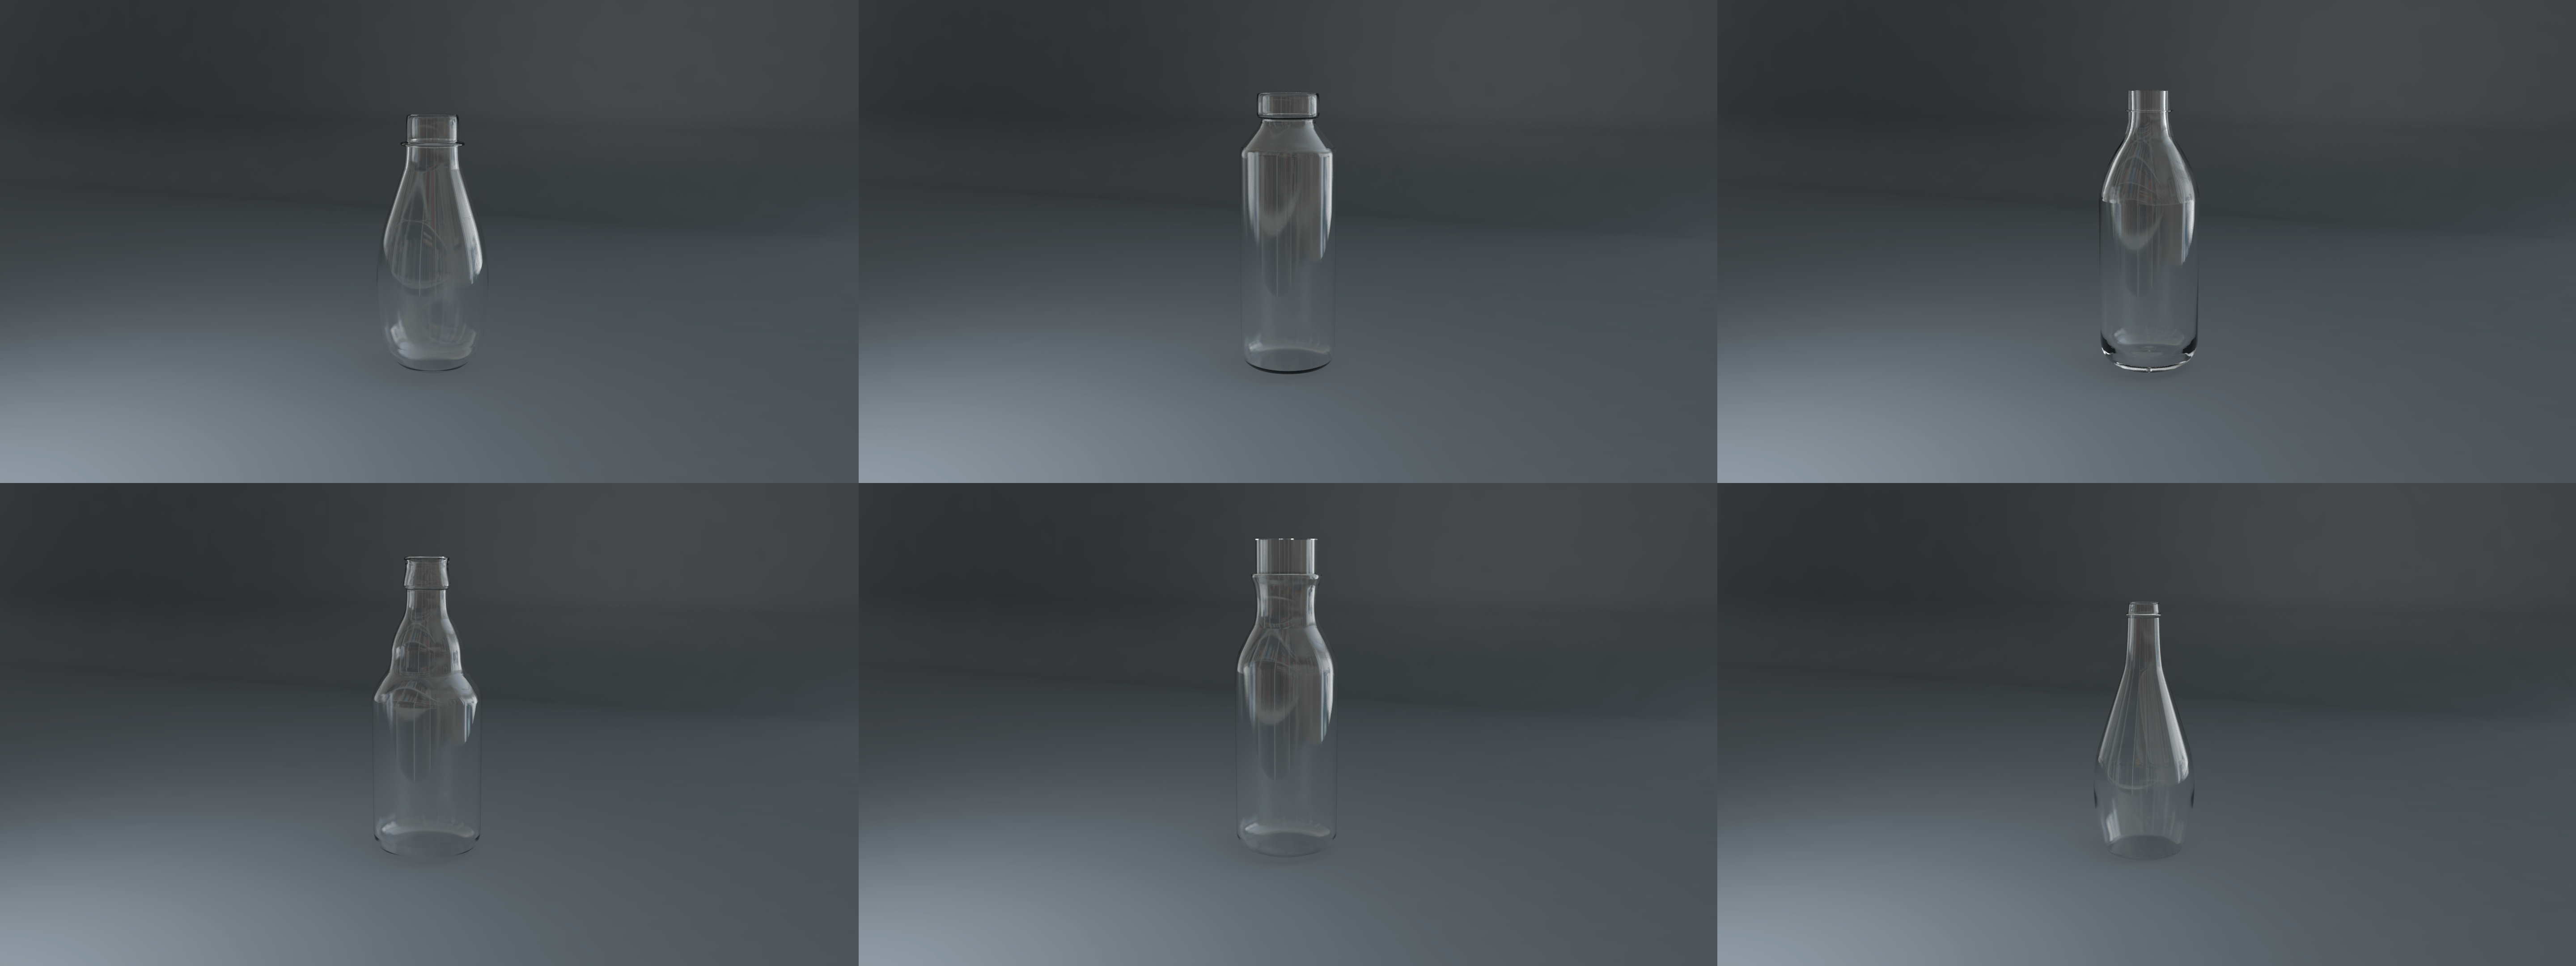
After the last modelling post, I set myself the task of finishing the bottle models. After completing the rest of the splines in Adobe Illustrator, I then saved it and imported it into c4d – from then I completed the same process I went through when completing the first model in the previous post. These are the final results of the models:
Overall, I feel these turned out really well. The realism of these is pretty good however, I feel there still room for improvement within the material settings and lighting to make them look even better – this could be the increase of the blurriness of the glass or the use of a studio HDRI that would better illuminate the models creating more attractive reflections.
Whats Next:
Now that the models were successfully created, I can now try and make the fluid object and material to go inside of the bottle, this will give a better indication as to how the final models will look. In addition, I can also now post these bottles onto social media to find out which one the target audience prefers – enabling me to get feedback from my target demographic.
After conducting my modelling research post using a tutorial from YouTube, I set about putting my newly learnt knowledge into practice by creating a bottle. The development video below denotes my commentary and also the steps in which I took in order to get the bottle from a simple spline in Adobe Illustrator to a full 3D model in Cinema 4D with textures. Here it is:
In the video, I demonstrated my abilities in drawing the profile of the bottle using a reference image, then exploring as an Illustrator 8 file and then importing it to c4d. Once in c4d, I realised that the different splines I had drawn (I had created two of them) had been imported as two different elements which were incredibly useful to know as I can now create all of the spline profiles in one document and then import them all across. After this, I then put the spline into a Lathe NURBS to turn the spline into a 3D object and created the bottle – what I didn’t know was when I imported the spline into c4d was that it wasn’t centred on the zero mark for the X, Y and Z axis. This meant that the Lathe NURBS was taking the splines position and revolving the shape around the zero point, thus creating a larger and wide object.
Final Render:
The final render has turned out well and has allowed me to deem it successful. With the added texture, the object looks really good – even if it might be lacking the thread for the cap at the top of the bottle. I feel that the way I closed the bottom of the bottle up was average, however, you can still see a defect where it’s not fully joined – this will need to be addressed. I feel that the bottom of the bottle could do with being less rounded, for my personal opinion I would like it to be more squared as I think that this would look more aesthetically pleasing.
Whats Next:
Now that this render was successful, I can continue on with the rest of the different shaped objects and create more 3D bottles with different shapes. In addition, I can also test out how the bottles will look like fluids in them – this will further test my abilities as I have never created a liquid texture before and especially ones with pulp in such as all the materials present in the typical juice drink.