Fluid Material Creation

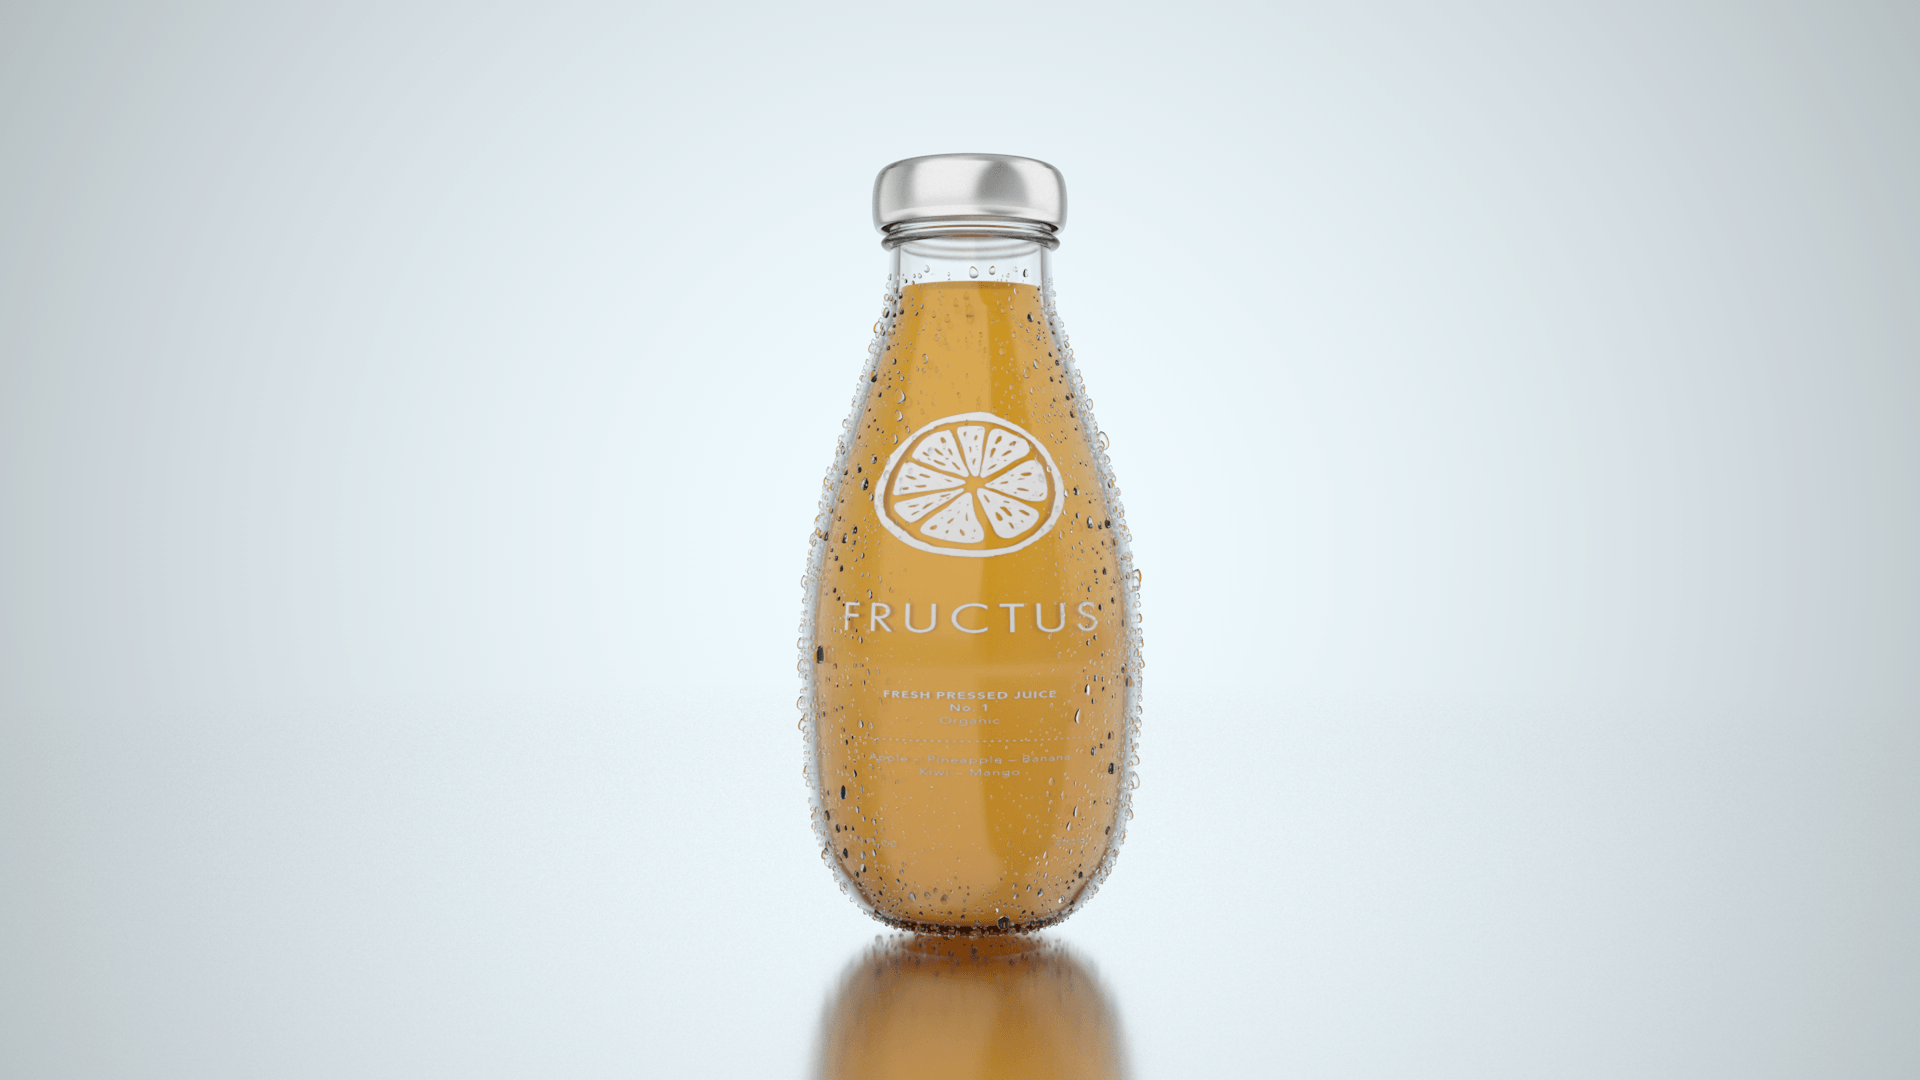
Using the pre-existing fluid object which I had created previously, I started to experiment with the Transparency and Reflection channels within c4d’s material editor in order to create a more realistic material for the product. When I started I didn’t know what ‘flavours’ or coloured materials I was going to create, I simply started to create something that looked real in order to achieve photorealism. Because the initial colour of the object was orange, I started with that – I disabled the colour and reflection channels and enabled the transparency, and using the water present within this I was able to create an orange looking material. After this, I then enabled the water present in the reflection channel which produced a good effect, however, it probably wasn’t necessary as the glass texture on the outside of the bottle created the main dominant reflections.

After these steps, there was a long period of fine-tuning – the colour specified within the transparency had a lot of strength to it, with the smallest amount of colour (controlled by the saturation slider) it had a drastic effect when rendered out, this colour strength change varied depending on how much material was behind it. After this process, I finally managed to get 3 material to a high realistic quality and rendered them out, these can be seen below.
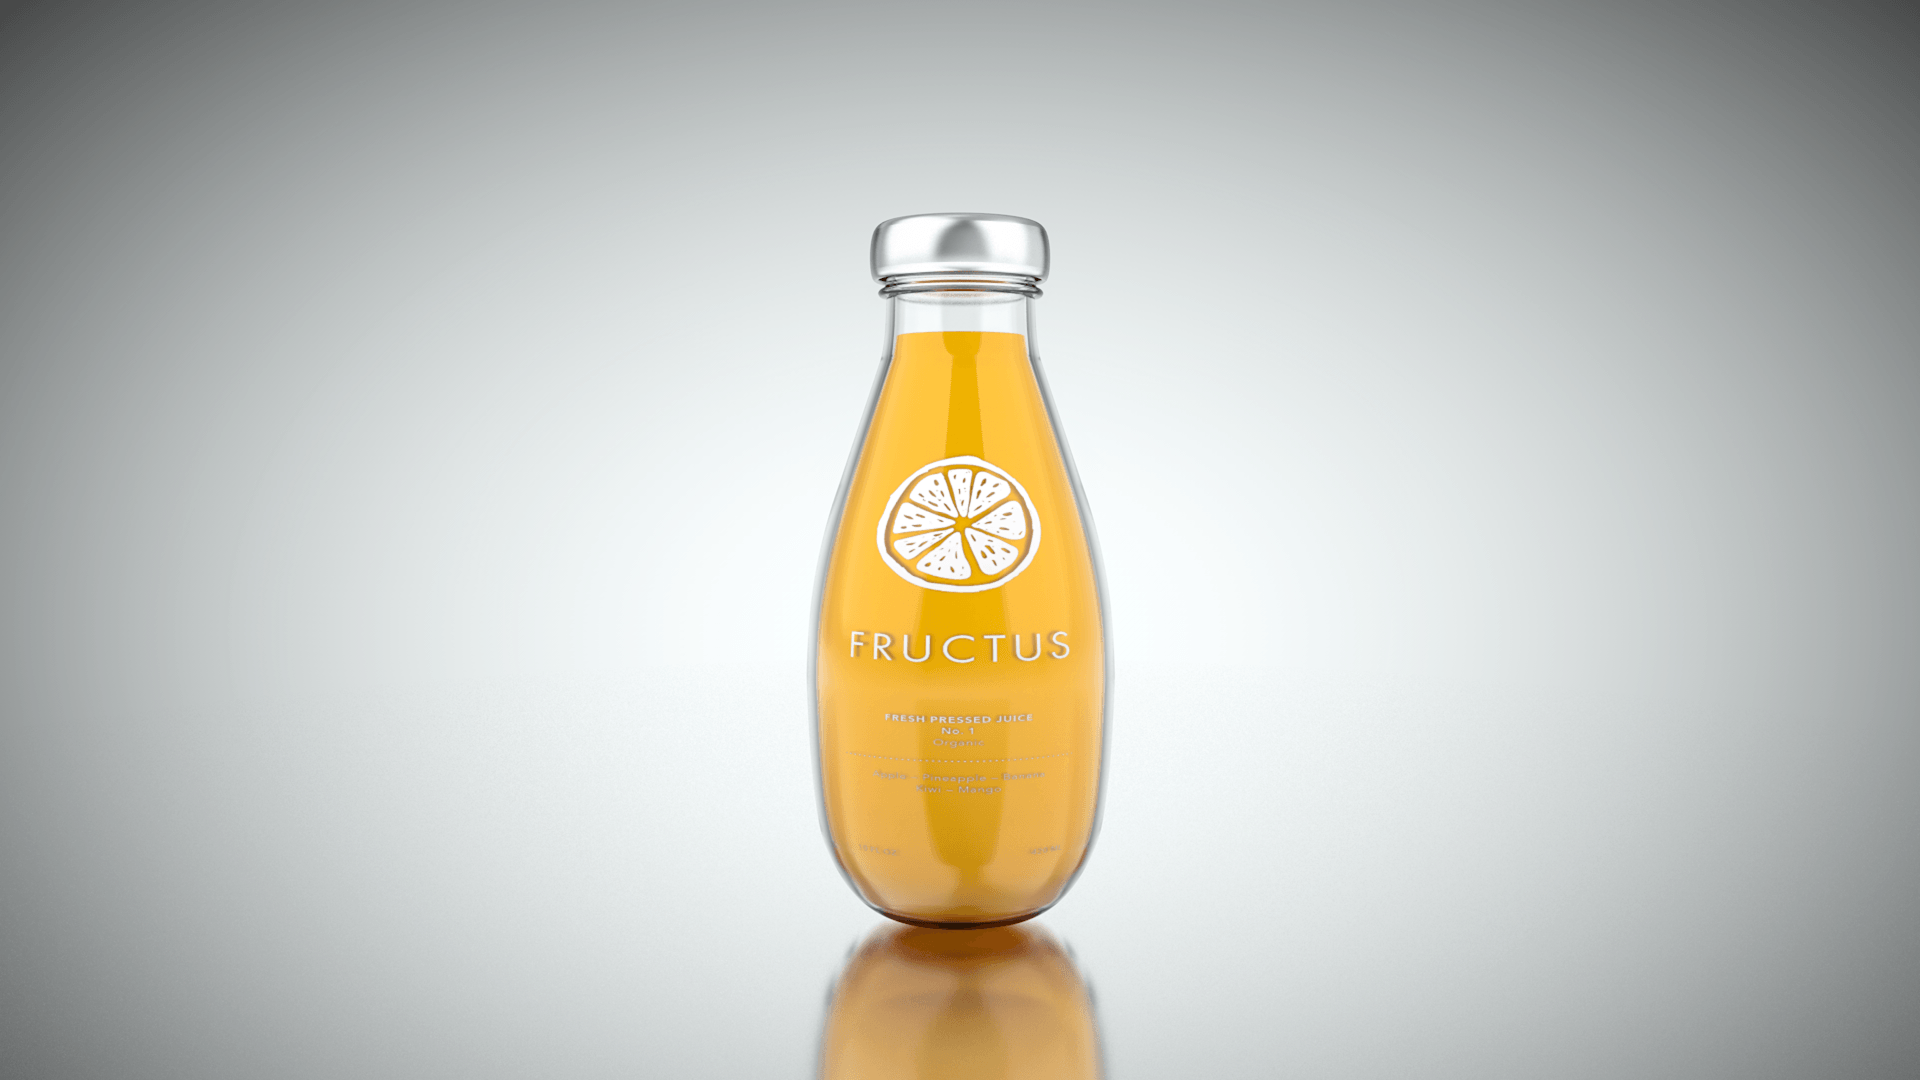
Final:

Fluids

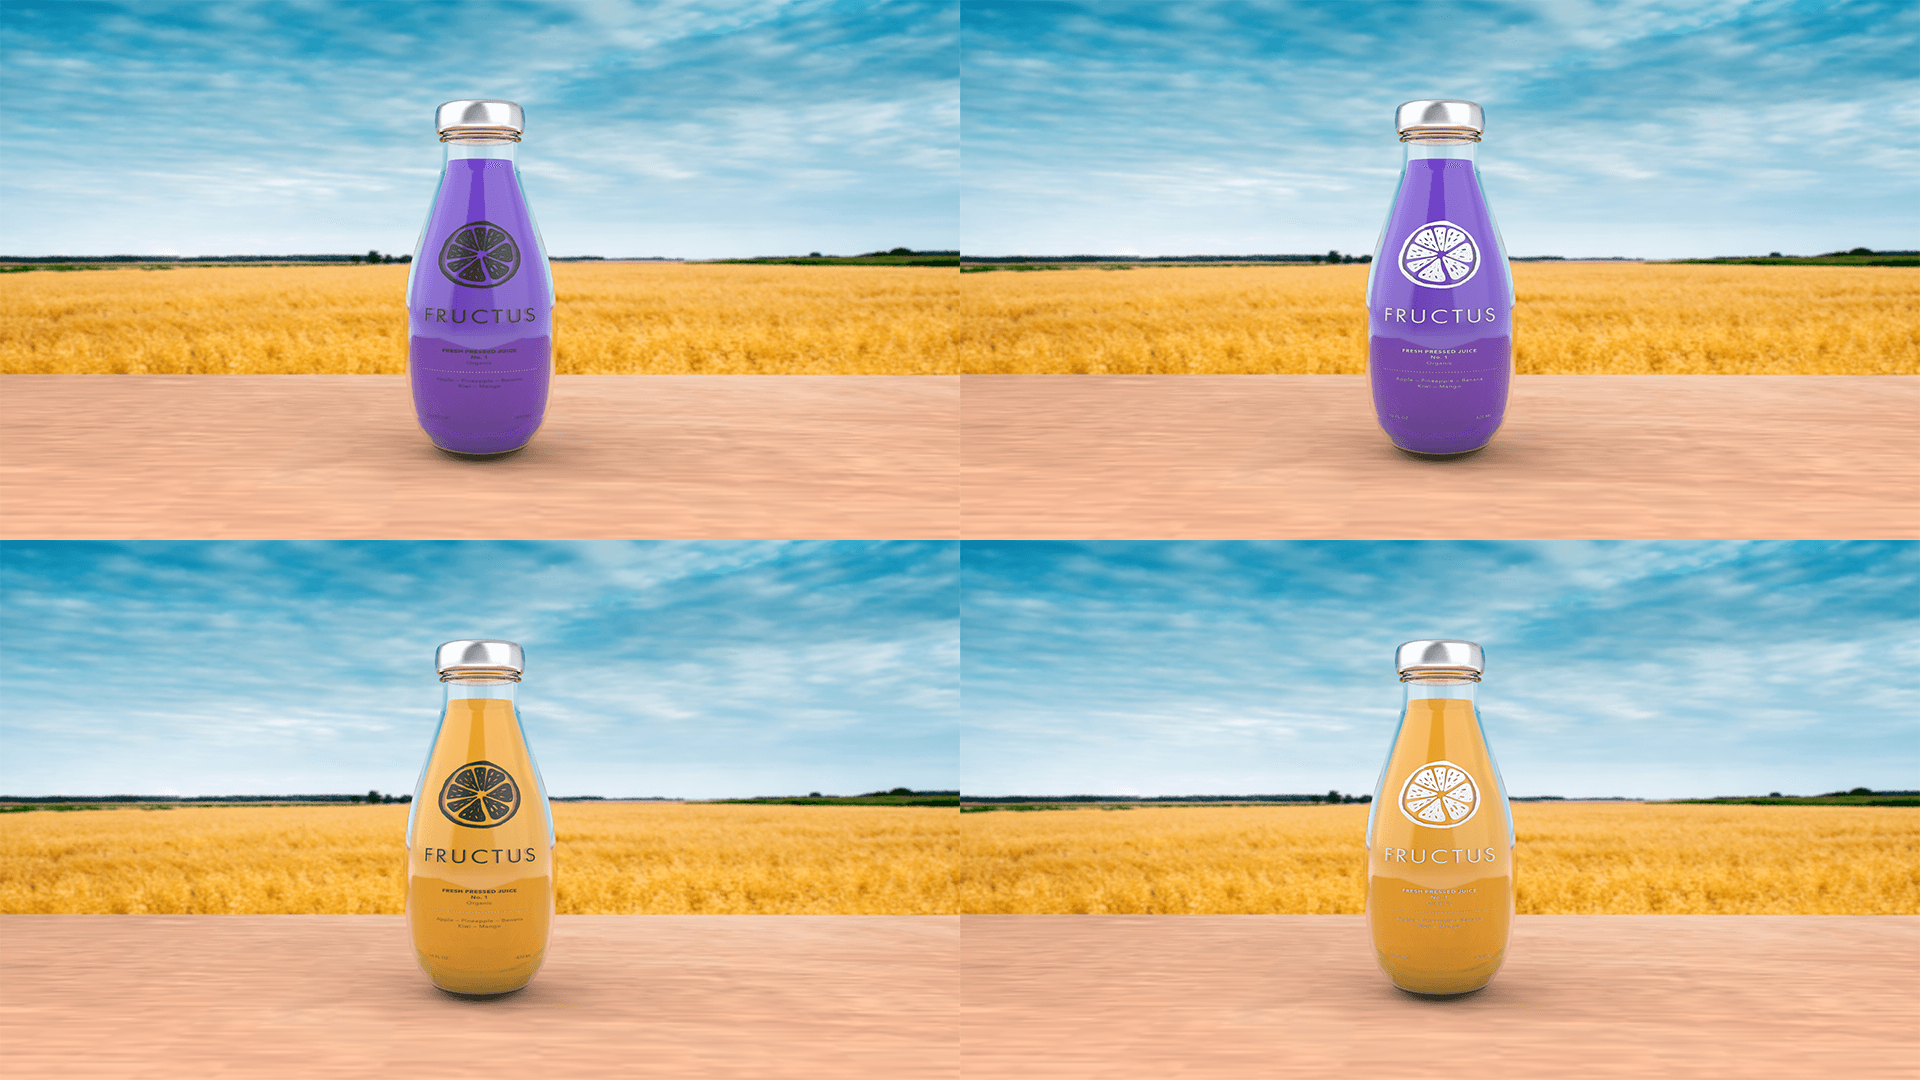
These are the final fluid materials that I had created, going in chronological order I had tried to create a Blood Orange, a Mixed Fruit and an Orange flavour. I feel that they look fairly realistic and this was achieved through experimenting with the transparency and reflection channels within c4d’s material editor, I was further able to fine tune this material through playing with the absorption distance to create a material that increased in transparency where thin – this is particularly evident in the top render where the main body of the fluid is a pink colour, however, towards the neck of the bottle where it gets thinner it becomes more orange.

Whats Next? 

Next, I am going to post these to social media to get a response as to whole realistic these materials are, and also how much the audience like them. This will then further allow me to make changes based on this feedback.

Condensation Creation

Using a tutorial found on YouTube, I am going to create condensation on the outside of the bottle. My processes and workflow can be seen in the time-lapse below where I experiment with different sized droplets and also the falloff for a more aesthetic look to the product.

Within this time-lapse, I documented my process of creating the condensation. This was fairly easy as I had step by step instructions from the YouTube tutorial on how to complete – the only difficulty I faced was forgetting to turn objects on again after making changes to my model. Because I made a lot of changes to the droplets, like checking their rotation and placement on the surface of the bottle, it made rendering out tests to the picture viewer more time-consuming. I would send the current frame to the render viewer and it would take about 2 minutes before I could actually start to see the model – this is mainly due to all the passes that are done in the Physical Renderer but it still meant that I had wasted some time on waiting around being unproductive.

However, even though I experienced this issue (to which I have now learnt to double check) the final result of the product looks very good and was worth while.

Final:

Condenstation2

Overall, the condensation effect is aesthetically pleasing and adds a nice feeling to the product – making it look more appealing to the audience. I feel the size of the droplets could be made a slight bit smaller to make it look more realistic as in the real world if water droplets were that big, gravity would make them fall down the bottle to the table surface.

Whats Next:

Next, I am going to work on the inside of the bottle and create 3 realistic fluid materials – each representing different flavours.

New Scene Production

After discussing my progress with my tutor about the scene creation, I wasn’t particularly happy with the background as it was too busy. I thought when planning this section that having an image in the background would be a good idea, however, this has seemed to have backfired – this is mainly down to the colours that were being used, as they were too similar. Because of this, I wanted to try and experiment with a different background that would put more emphasis on the product, the video below shows my creative process:

Within the video, I denoted the process in which I took to create the scene shown in the render below. I used a mixture of new techniques, such as using a mirrored floor surface to create a seamless background that could be easily changed through the alteration of one parameter, this enabled me to change the whole scene really quickly as I would only have to change the background plate  in order to get a whole new look. This worked out really well as I was able to get a nice look background for the bottle to be paced into that wasn’t too busy, allowing for the sole attention of the audience to be placed onto the product.

Final:

NewprojectsceneR

Overall, the render turned out really clean and minimal, which is a welcome positive to have as it greatly reflects my branding. The overall colour of the background has room for variation as subtle colour could be introduced to warm the overall image up or additionally, it could be used to contrast slightly with the liquid materials when they are created.

Whats Next:

Next, I will start to develop the condensation modelling that will be placed on the outside of the bottle, with the aim of sub-consciously suggesting that it is a refreshing and cool product.

Scene Creation & Label Integration

After creating the liquid objects for all of the models, I wanted to create the scene in which the models were going to be placed in when rendered. Using my knowledge from previous projects, I started to create the scene with textures in order to stage the models, documented in the video below I discussed these developments and also further talking about problems I encountered.

The creation of the scene was a very easy process to complete initially as I understood the basics of setting it up, however, when it came to making the fine adjustments that was when I found it consumed a lot of time. One specific example of this was adding depth of field, I experimented with this in two ways: by actually adding it to the camera under the render settings and also by adding blur to the background image in the material editor. I found that adding depth of field to the camera under the render settings worked the best as it allowed for a smoother transition from focus point to the unfocused (blurry) point in the image – by using the other method, all of objects in the foreground were clear and didn’t look aesthetically pleasing when next to the blurry background image.

Renders:

These are the renders of the scene – specifically the images & textures that were used. I used one model to act as a placeholder so I could get a better feel for the set up of all of the scene objects and camera positions to best show off the product.

FinalR

Overall, I think the lighting of it was really good and helps to bring the product to life as it looks real, however, after a lot of thought and reflection I’m not sure that the background suits the style of the product – because the product is supposed to be minimalist, I feel there is too much going on in the background which will distract the audiences eye. In addition, trying to think ahead to the creation of my website, will these images conflict with the minimalist theme that I intend to use throughout the website or will it prove more difficult for me to integrate them.

Whats Next?

Next, I will make some adjustments to the label, fixing points which I highlighted in the video – I will then follow up on this with a render to show its changes. As well, I will also start to work on the liquid materials, focusing on trying to create something that looks realistic. Finally, I will also aim to produce an alternative scene, one that better suits the minimalist design utilised throughout my product.