Audience Feedback

After completing my first render for the product, I went to social media, specifically the Digital Media or ‘Digibods’ page to get feedback from my peers. From the screengrab below, you can see the feedback:

Screen Shot 2018-04-20 at 11.59.58

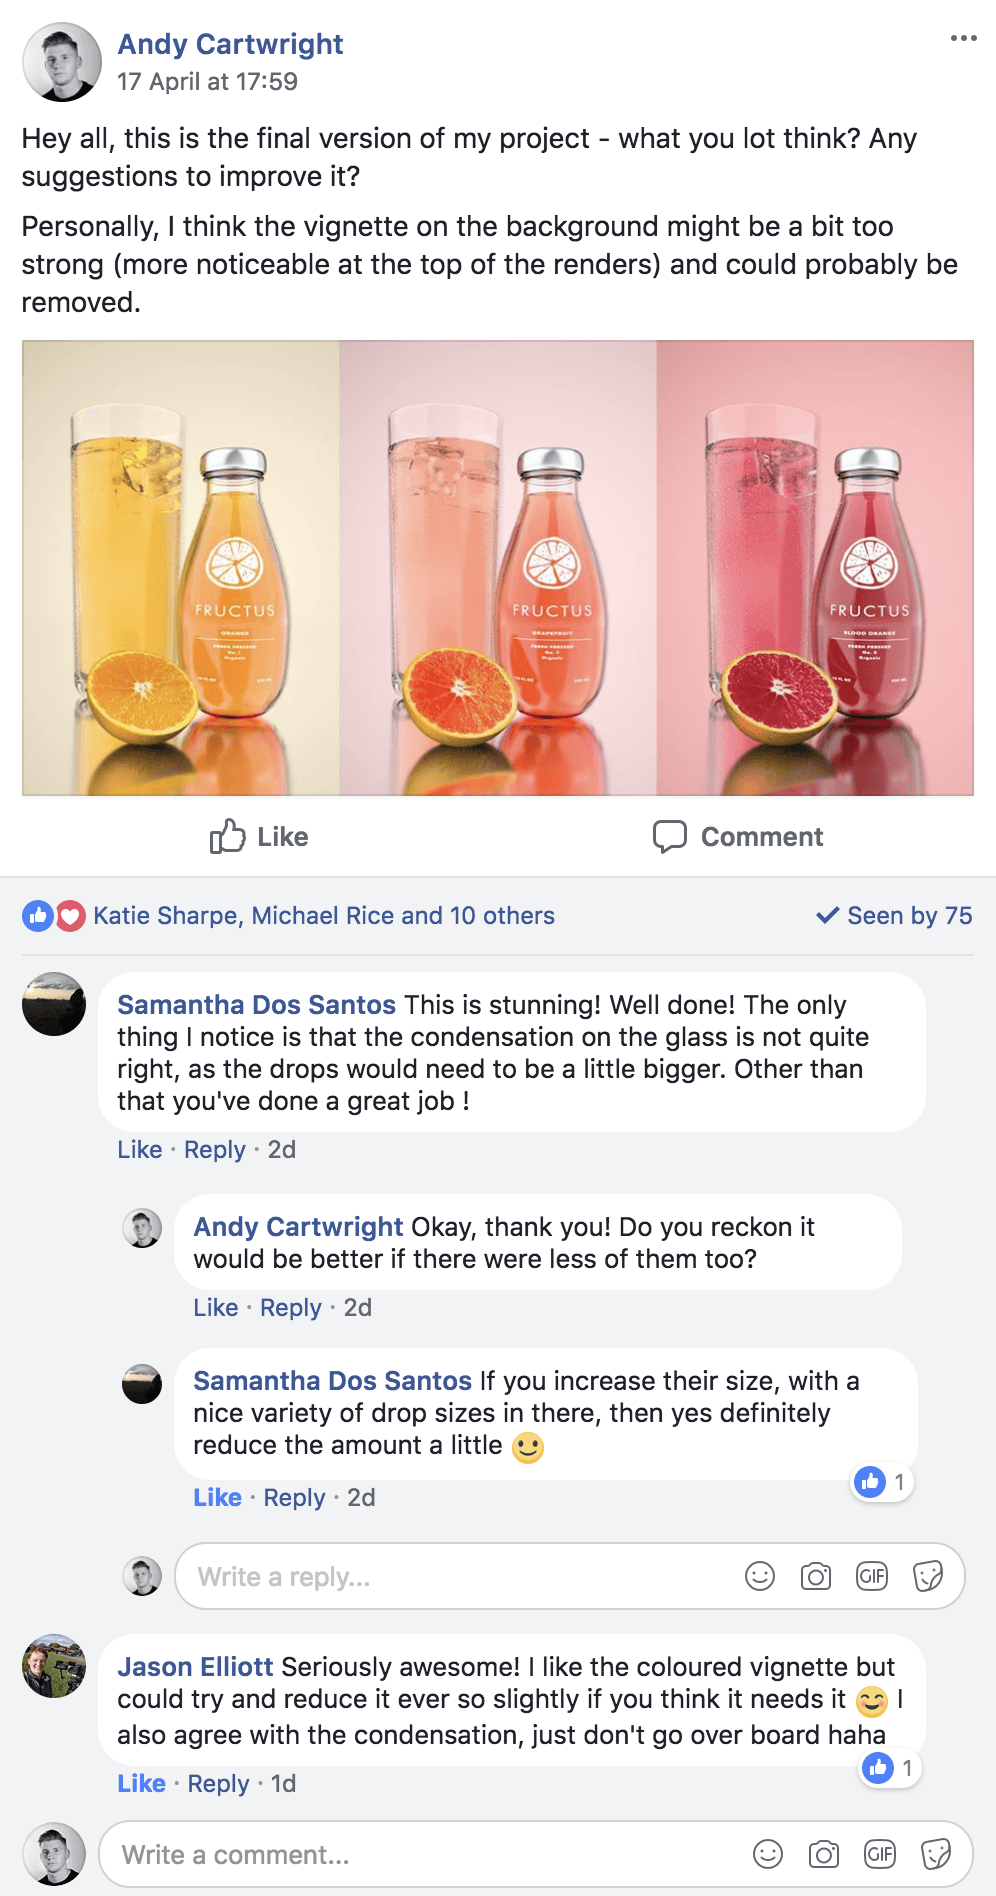
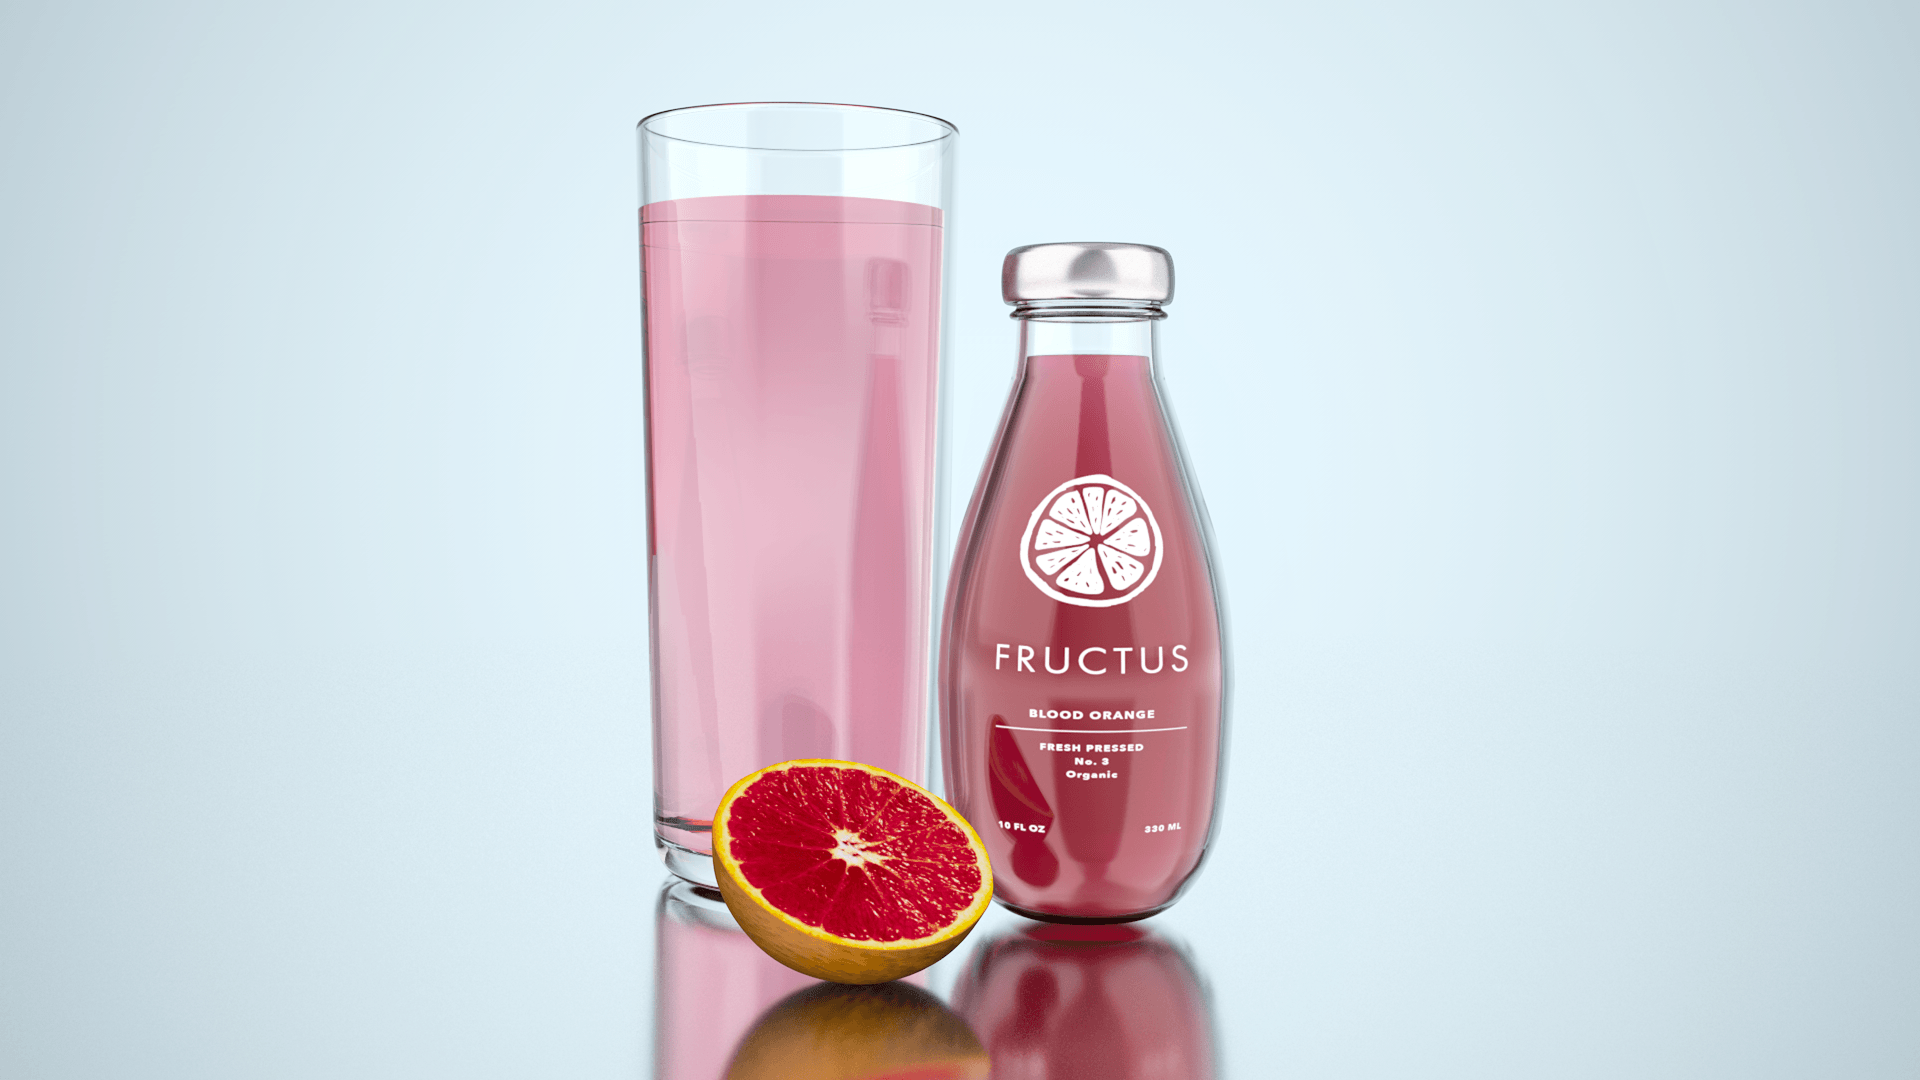
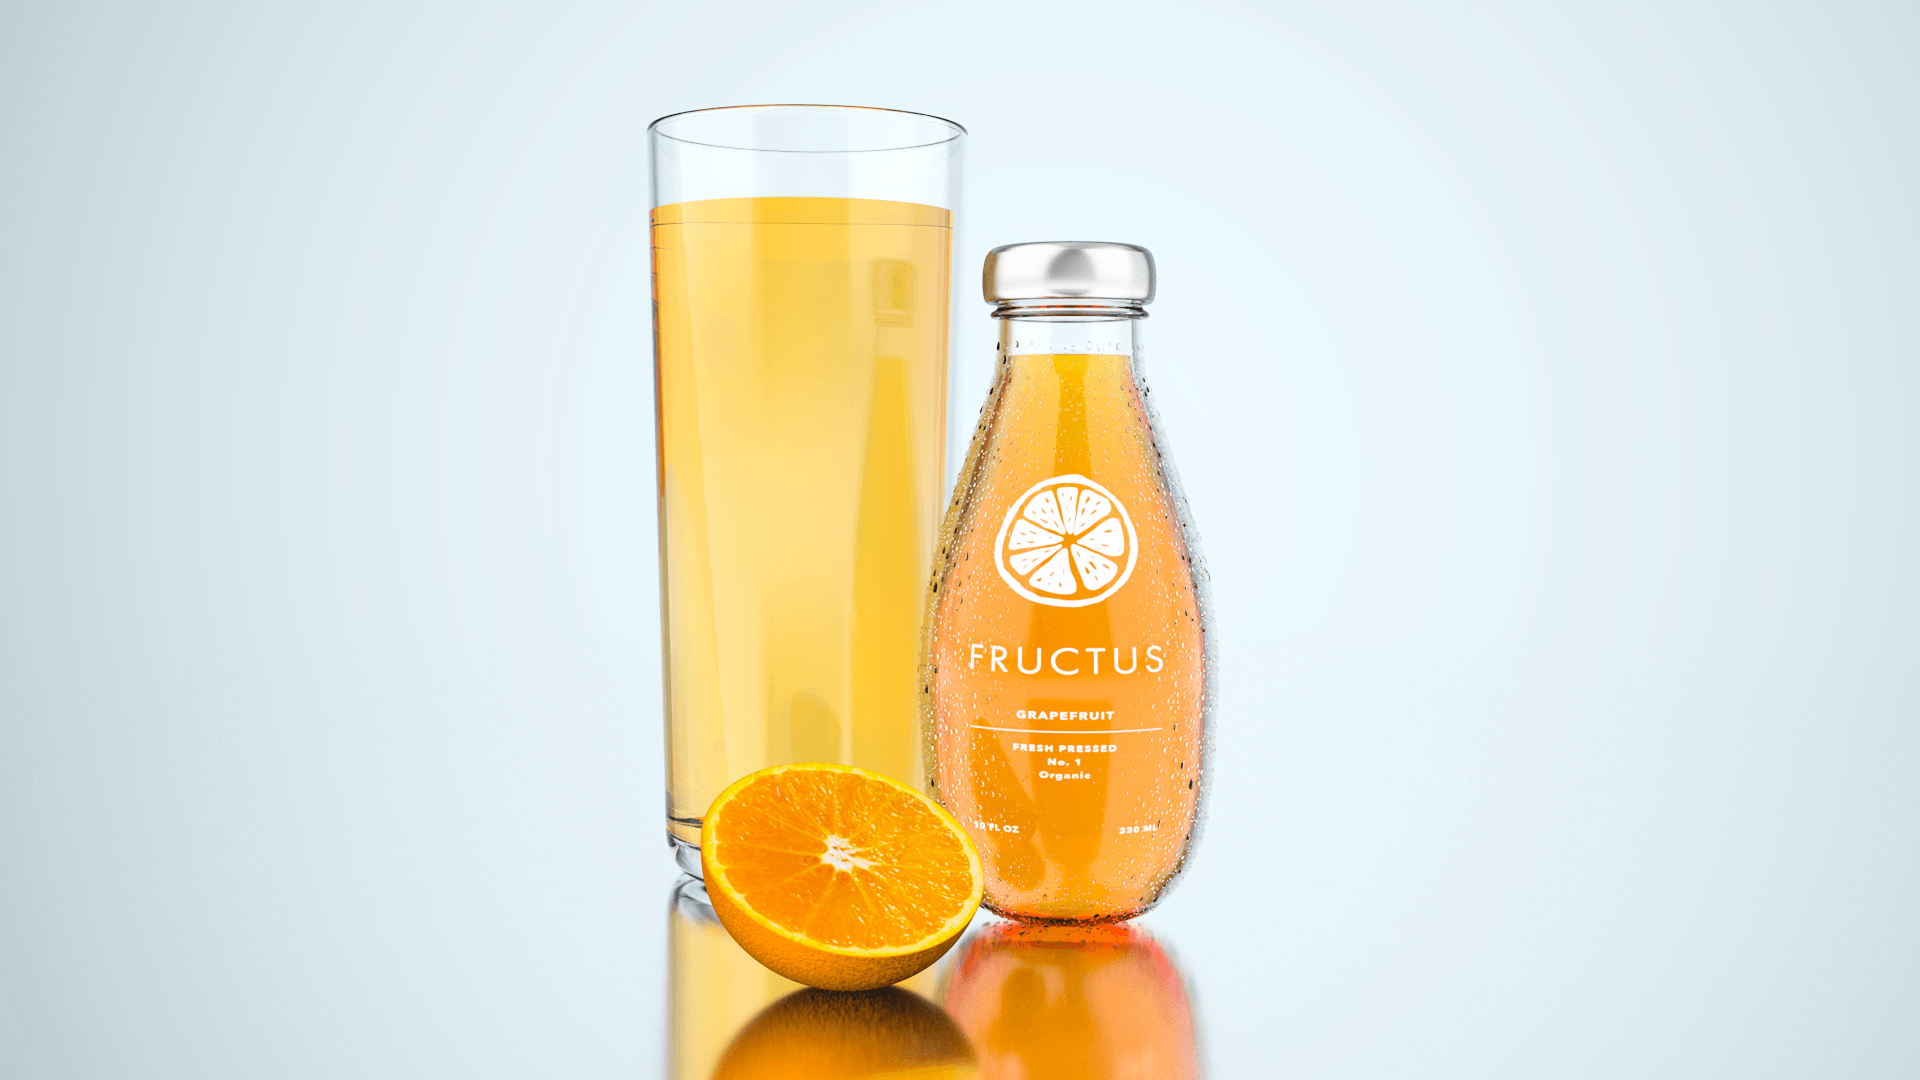
Overall, the renders got really positive feedback, with many people liking it, which is really good! I also got feedback mainly about the condensation droplets size as two people thought that it was too small and didn’t look realistic enough – from this feedback, I have then made corrections to the renders and my final versions can be seen below.

Renders:

GrapefruitOrangeBoold Orange RAW

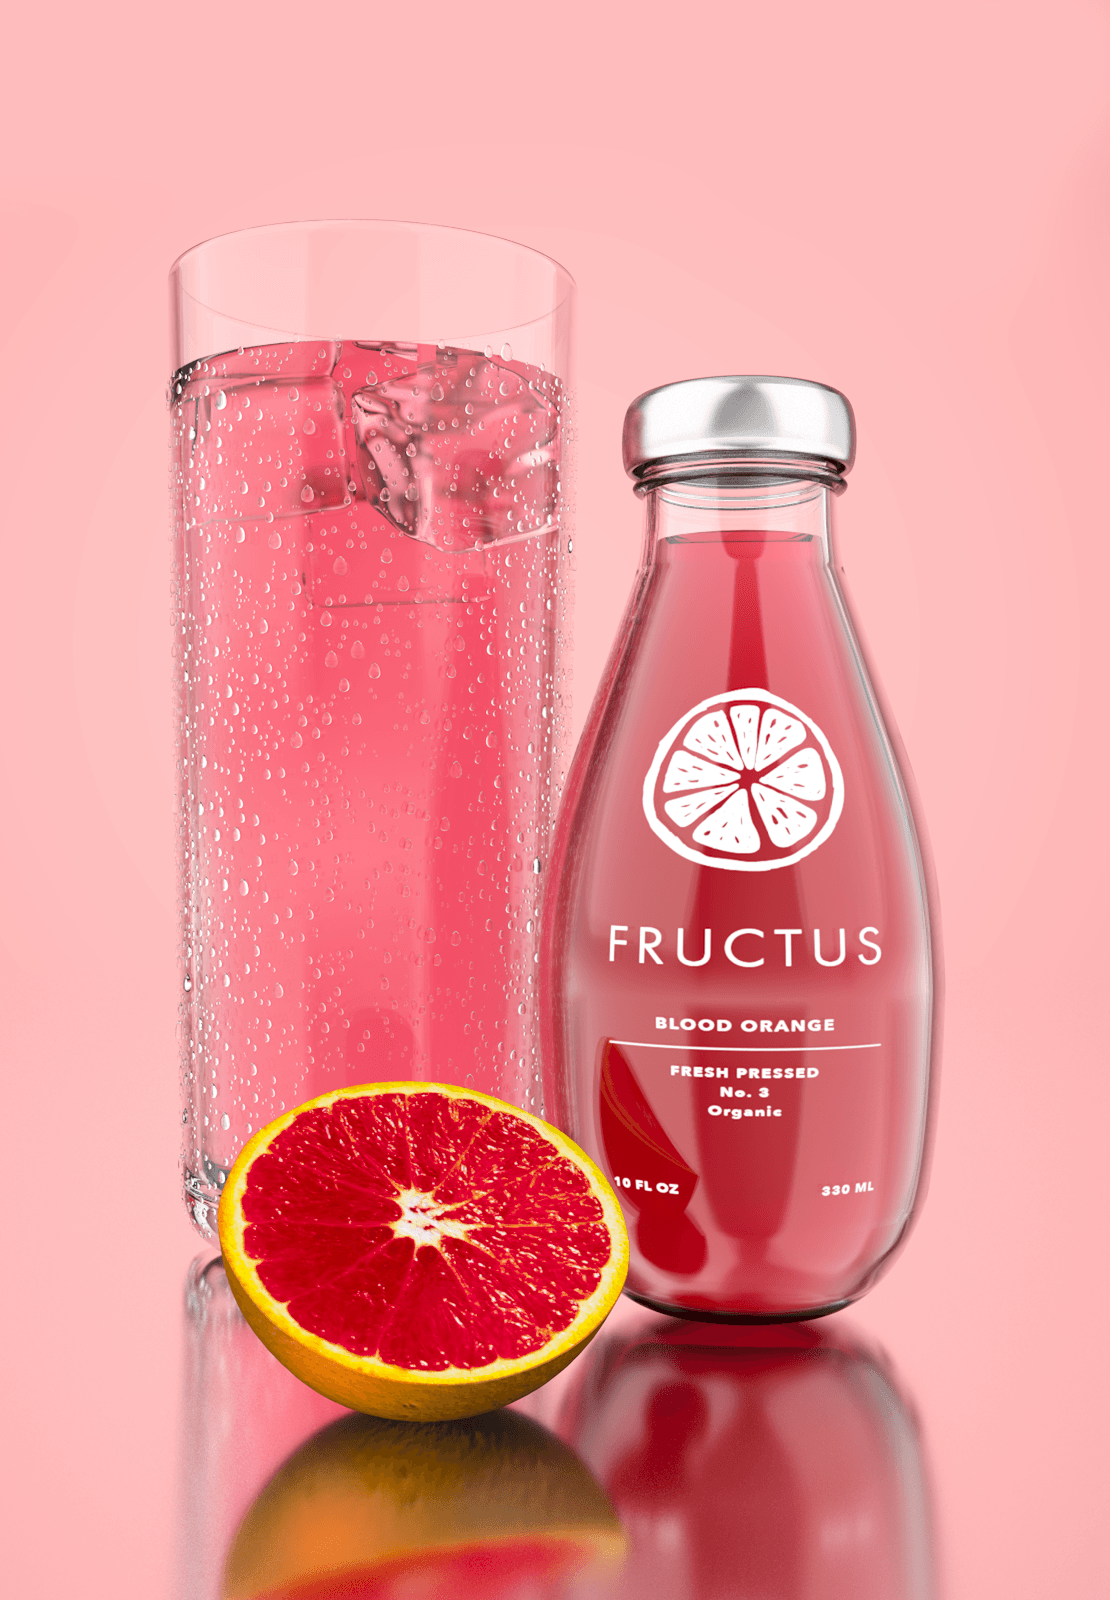
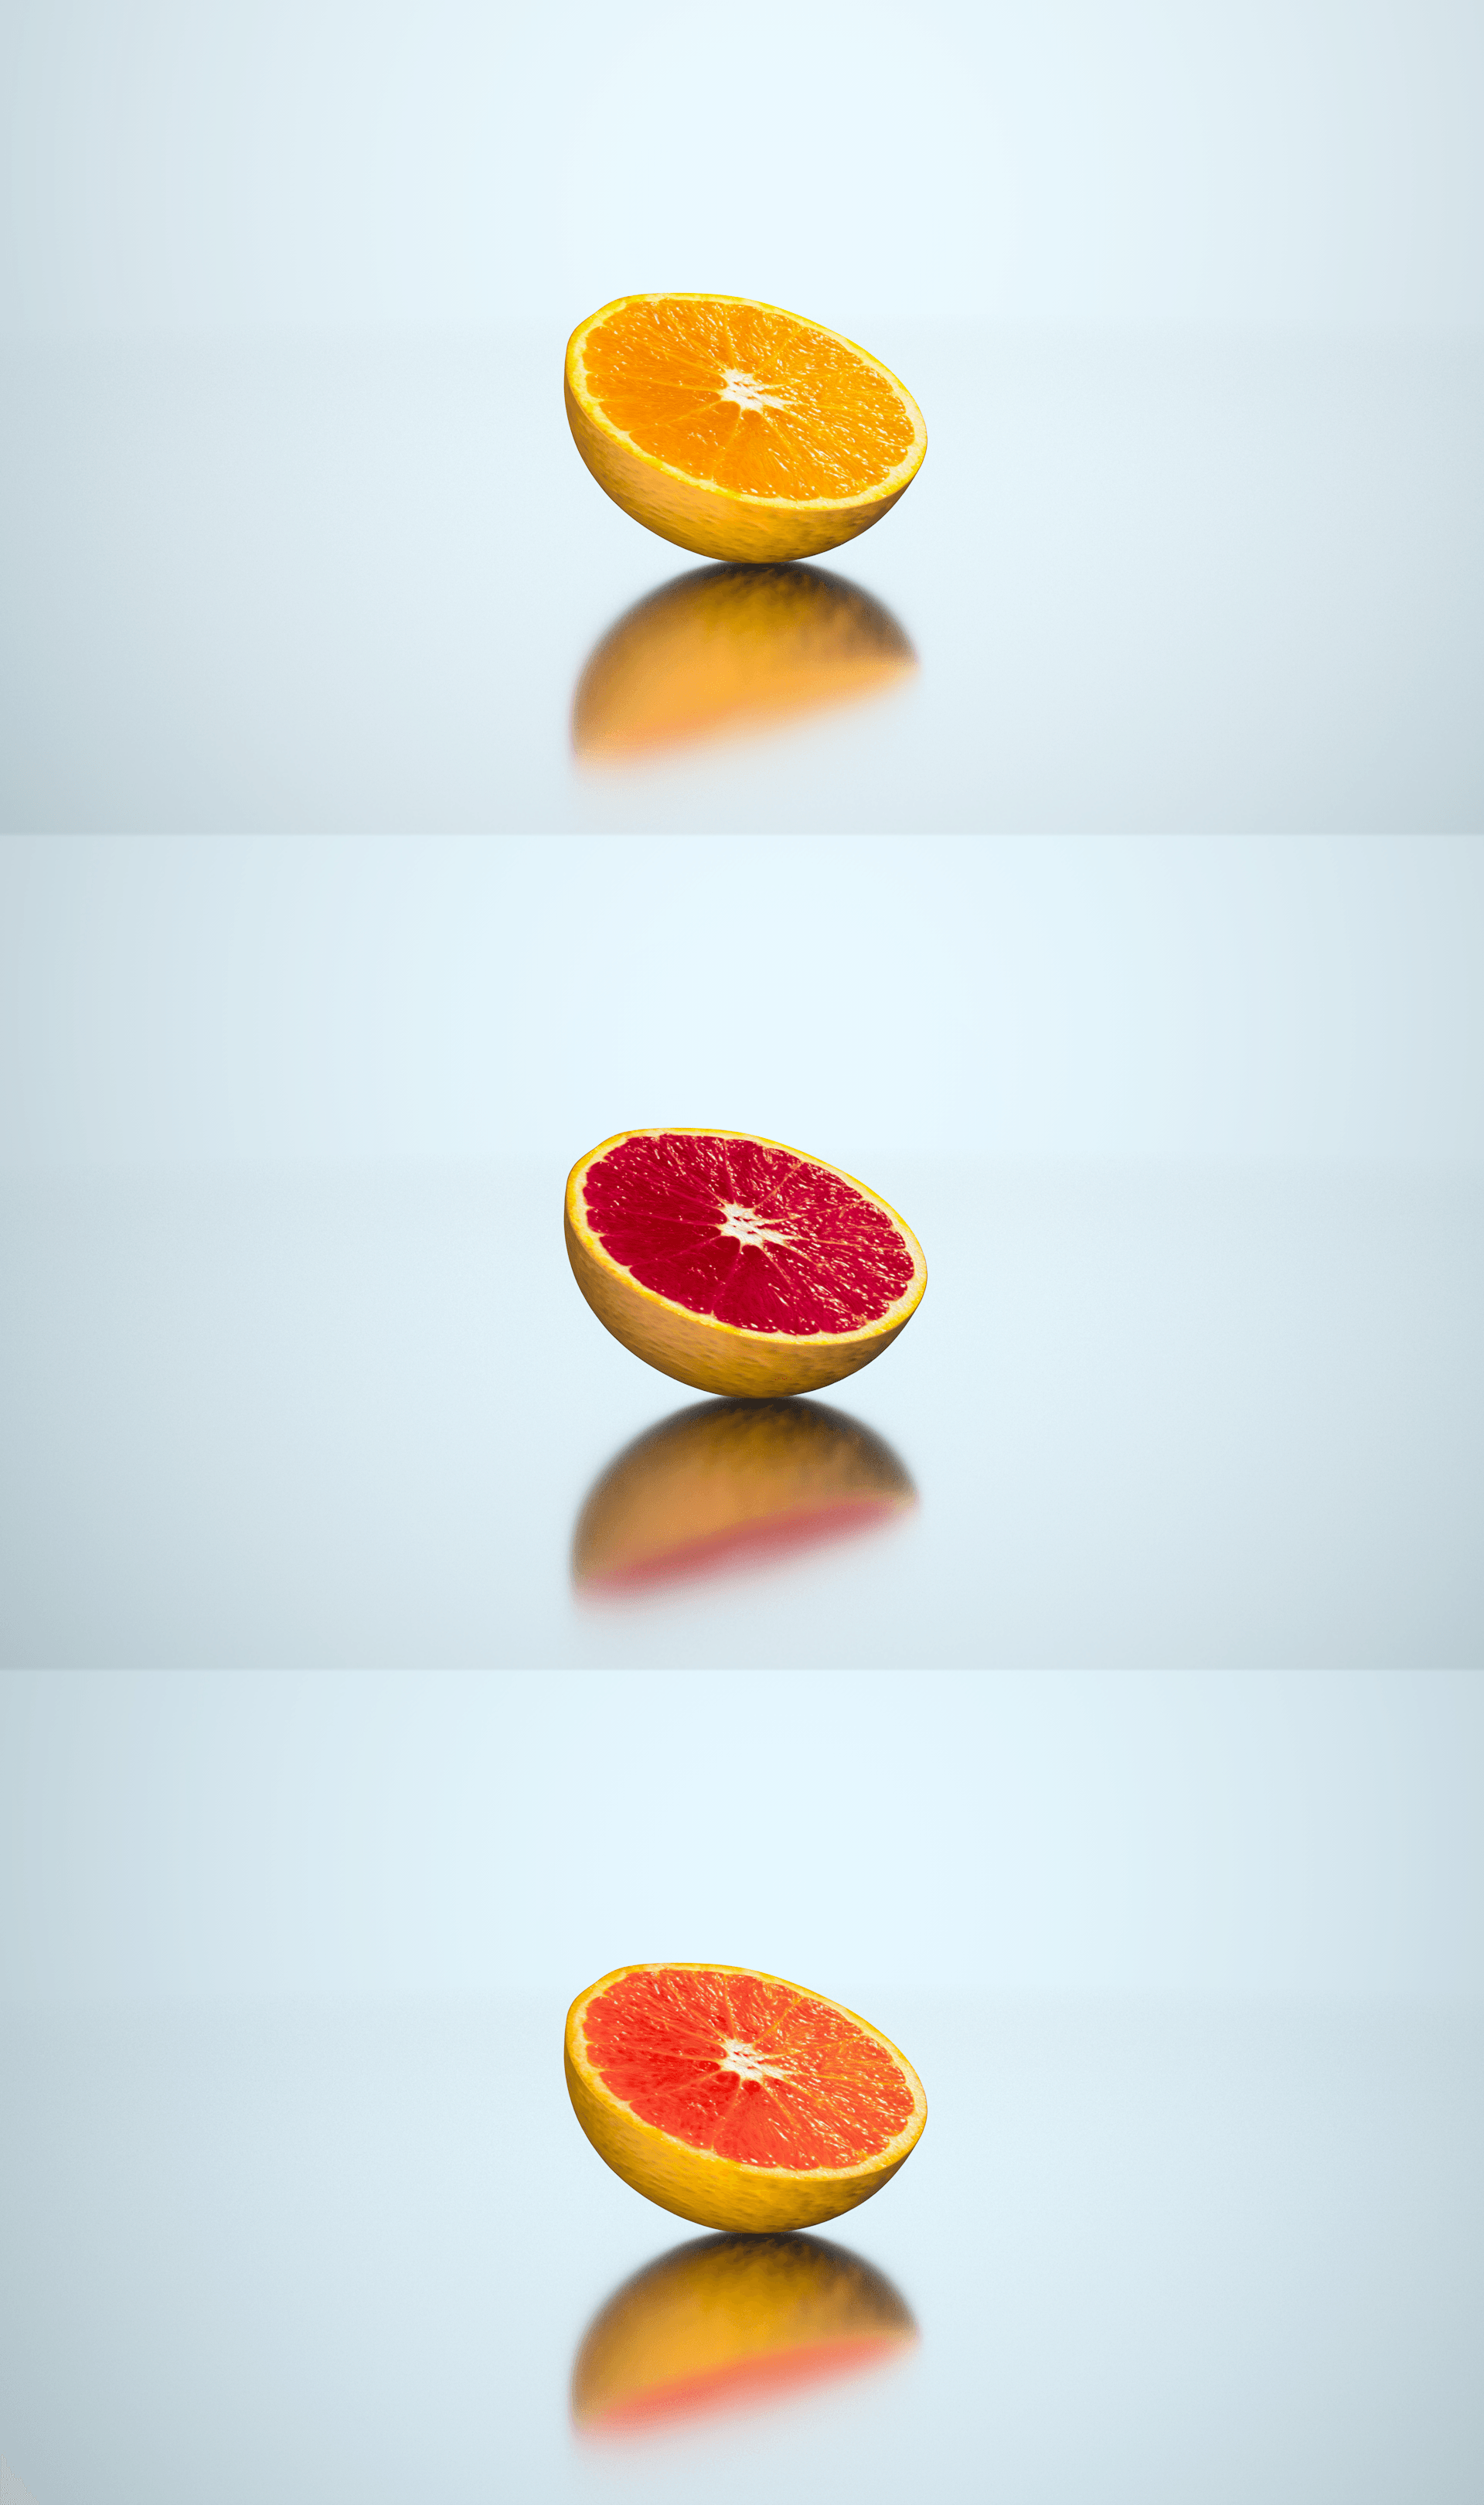
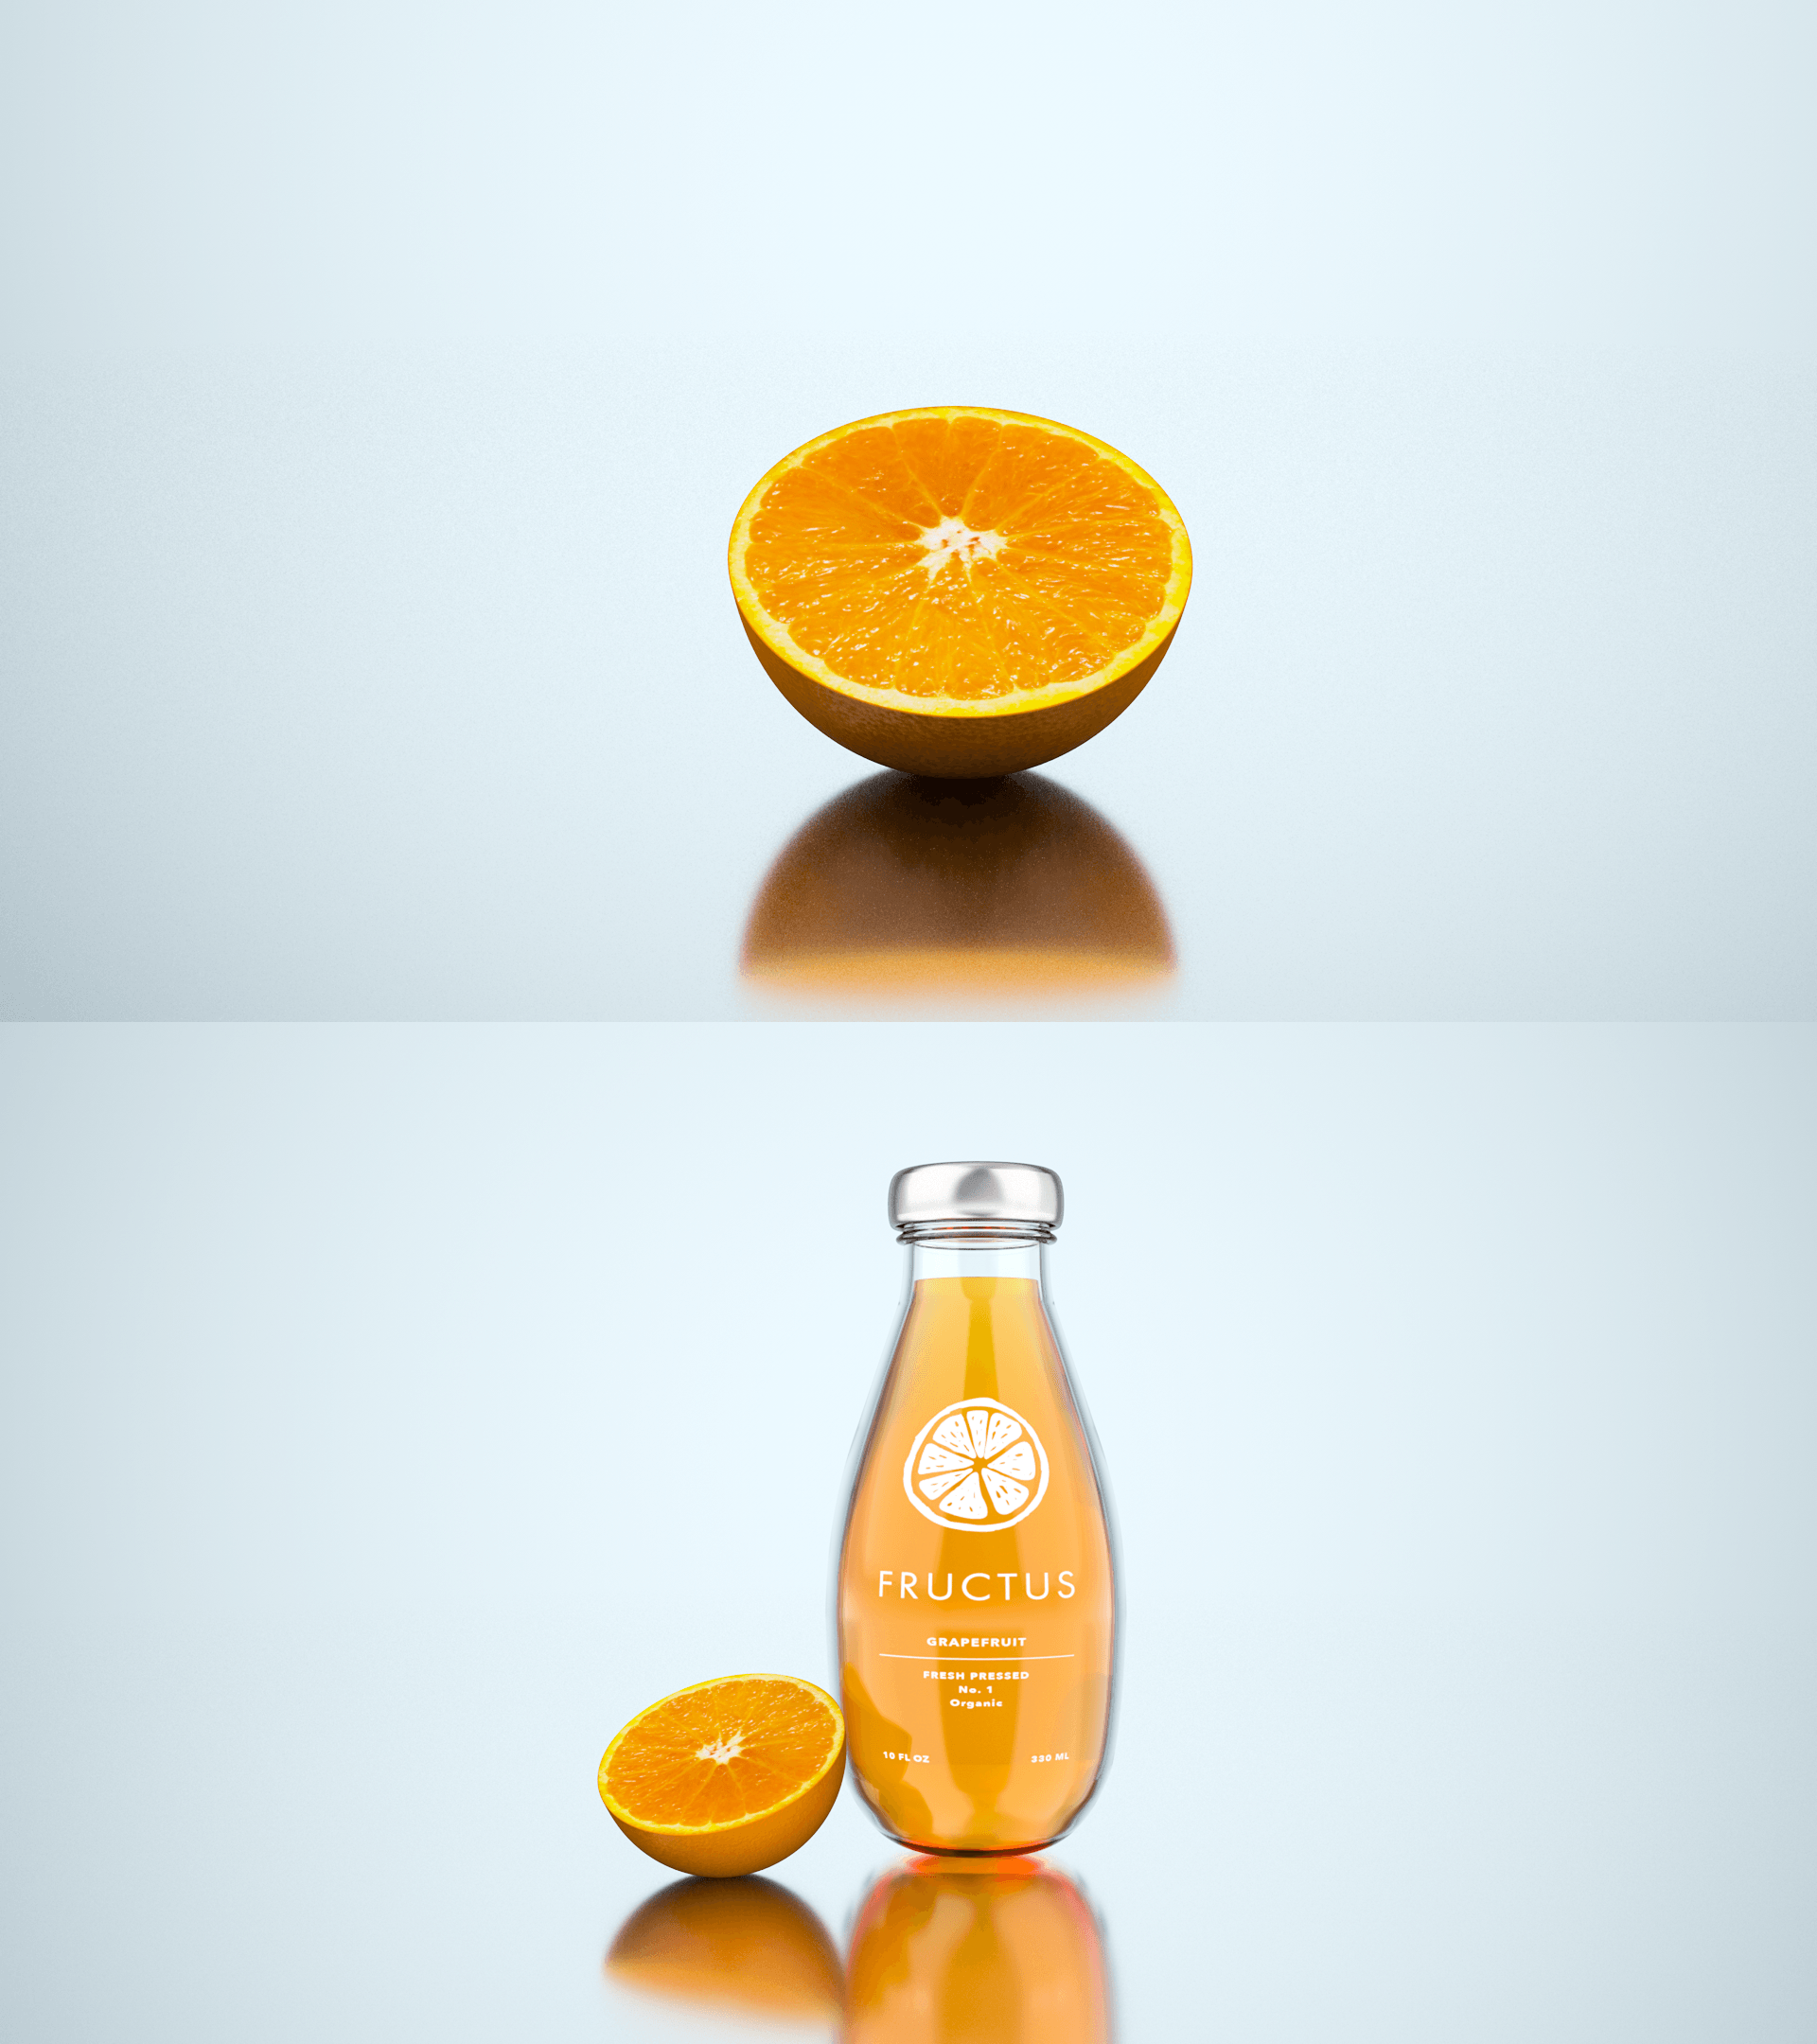
The droplet sizes have been increased and I have also changed the rotation of the ice cubes & fruits slightly to add to the variation. I’m really pleased with how it turned out & I’m excited to start on the website creation to contextualise it all.

HTML vs Muse

When discussing the concept of my project at the start of the semester, I wanted to contextualise my product with a custom Adobe Muse website to act as a platform to sell it – this seemed like a very logical reason as I have good eye for design and no prior knowledge of HTML, which would make creating a website fairly difficult. However, fast forward to today, a new announcement has just been released by Adobe stating that Muse will no longer be supported and within 2 years the program will be terminated, all discussed in this webpage: https://helpx.adobe.com/muse/kb/adobe-muse-end-of-service.html

Unfortunately, this has created new problems for me which I didn’t expect to encounter – now that Muse will be unsupported in 2 years, how will I get around hosting my work via Business Catalyst and what are the alternatives?

Fruit Texturing

After successfully creating the orange and integrating it into the current and latest version of my project, I continued to make the other fruits – the grapefruit and Blood orange:

In the timelapse I showed myself cutting out the inner flesh of the fruit in Photoshop, isolating the inner section so I could alter the colour whilst retaining the original look for the skin. However, I forgot to record the last half of this stage where I implemented it into C4D – This section was very tedious as I was making small alterations to the hue, saturation and vibrancy of the image to make it look more realistic and to also achieve the desired look which I had envisioned, which can be seen below.

Renders:

Final

I’m really happy with the way these turned out, they look really good and are a close representation of real fruit versions. When it comes to rendering these out with all of the assets together, I will alter the rotation, scale and the displacer to create slight variation between the different fruits. In addition, I can further change this by editing the original image in Photoshop if a more drastic visual change is needed.

Whats Next:

Next, I need to edit the liquid materials so that they compliment the colour of the fruit further – denoted in the render below its visible to see how the colour of the fruit doesn’t match the colour of the liquid. In addition, I also need to add the ice cubes to the glass to make it look desirable, cool and refreshing.

fruitzzz

Fruit Integration

After modelling the orange (shown in the previous post) I decided to integrate it into the latest version of the project, experimenting with its positioning and scale to that it looks balanced. The render below is its current state, however, I still feel like it needs to be changed – Im not sure on its overall balance and I think it could be further refined.

Renders:

FruitIntegrationFinal

The 3 objects look very good together, however, this took a lot of time to get it to where it is now. I feel further research and testing will have to be conducted in order for it to look better, which I can document in the future.

Fruit Modelling

Within my Scene Dressing post, I set myself the task of modelling some fruit to support my other assets within the renders. The voice-over below explains my process of creating them and justifies why I did certain actions when creating it.

As stated briefly in the video, I had used a tutorial on YouTube the first time round which had some good-ish results, however, the method of using a Boole to half the sphere meant that the edges of the slice couldn’t be smoothed out or bevelled – this was a major problem as I was very noticeable and really held back the quality of the other assets in the render. By switching to my method, it completely eradicated this problem, however, it took a little while longer – a compromise which is well worth taking.

Renders:

Orangerenders

Overall, Im really happy with the way the Orange model turned out – I think that the use of a high-quality image and also the careful refinement of their materials made it look photorealistic. I will continue to play around with the orange skin or peel as I’m not satisfied with it entirely, however, this will come after creating the rest of the models and sources the images.

Whats Next:

Next, I will create the remaining two fruits: a Blood orange and a Grapefruit. In addition, I will integrate all of the assets together and further refine their arrangement so they look aesthetically pleasing.